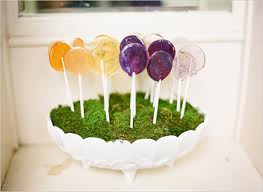
Lollipop Gardens
What could be more creative than growing something from seed? Make growing simple and fun by gluing a few seeds to a flat ice-lolly stick with non-toxic water-based glue. Write the name of the plant on the other end of the stick using indelible pencil or a waterproof marker pen. When you're ready to grow, just pop the lolly stick in your prepared soil. Make several sticks with different plant seeds and tie them with a pretty ribbon to give as a gift to that green-fingered person in your life.
Lollipop Wishing Well
Glue flat lolly sticks around the outside of an empty can or a cut-down soda bottle. Cut a pitched cover out of cardboard or assemble one from sticks; attach this to the wishing-well using a lollipop stick on each side. Paint the cover in brick-red or bark-brown colours; stain the well itself with dilute brown acrylic paint.
Lollipop Pendants

For these sweet-tooth pendants, you'll need polymer clay in two candy colours: red and white, for instance, or pink and pale yellow. (If you're using plastic rather than wooden sticks, it's recommended that you use air-dry polymer clay, since a plastic stick will melt in the oven.) Roll the polymer clay out into two long "snakes" of roughly the same length and diameter, then twist the two snakes together to make a rope. Coil the rope into a flat spiral, making sure that the coils all stick together and there are no gaps. Carefully push the stick into one side of the spiral.To add a ring to the pendant you can either bore a hole in the stick so that the lolly pendant hangs upside down, or push a hole through the clay while it's soft. Smooth away any fingerprints using the back of a spoon or a finger dipped in petroleum jelly. Harden the clay according to the manufacturer's instructions, then add a ribbon or chain.


 GBP
GBP

